A photo booth template is the overlay that frames your guests' photos — the artwork, the text and the transparent slots the pictures drop into. It is the one asset every booth operator needs for every single event, and the one that used to eat an afternoon in Photoshop.
This guide walks through building one in three steps. The tool never asks you to draw anything: you pick a layout, show it a style, and fill in whatever details you want.
Before you start
- The output size you needYour booth software dictates this. 1800×1200 is the common 6×4 print; there are also strip, square and vertical sizes, plus screen sizes like 1920×1080.
- A style directionEither an occasion in mind for the library, or an image whose look you want to copy — an invitation works beautifully.
- The names and dates for the designTechnically optional, but have them ready. Filling them in is what turns a generic layout into this specific event's template.
- A free accountGenerating uses credits. Trial results carry a watermark until you move to a paid plan.
Two ways to set the style
The second step is where the design actually gets decided, and it offers two routes. They produce very different kinds of results, so the choice matters more than it looks.
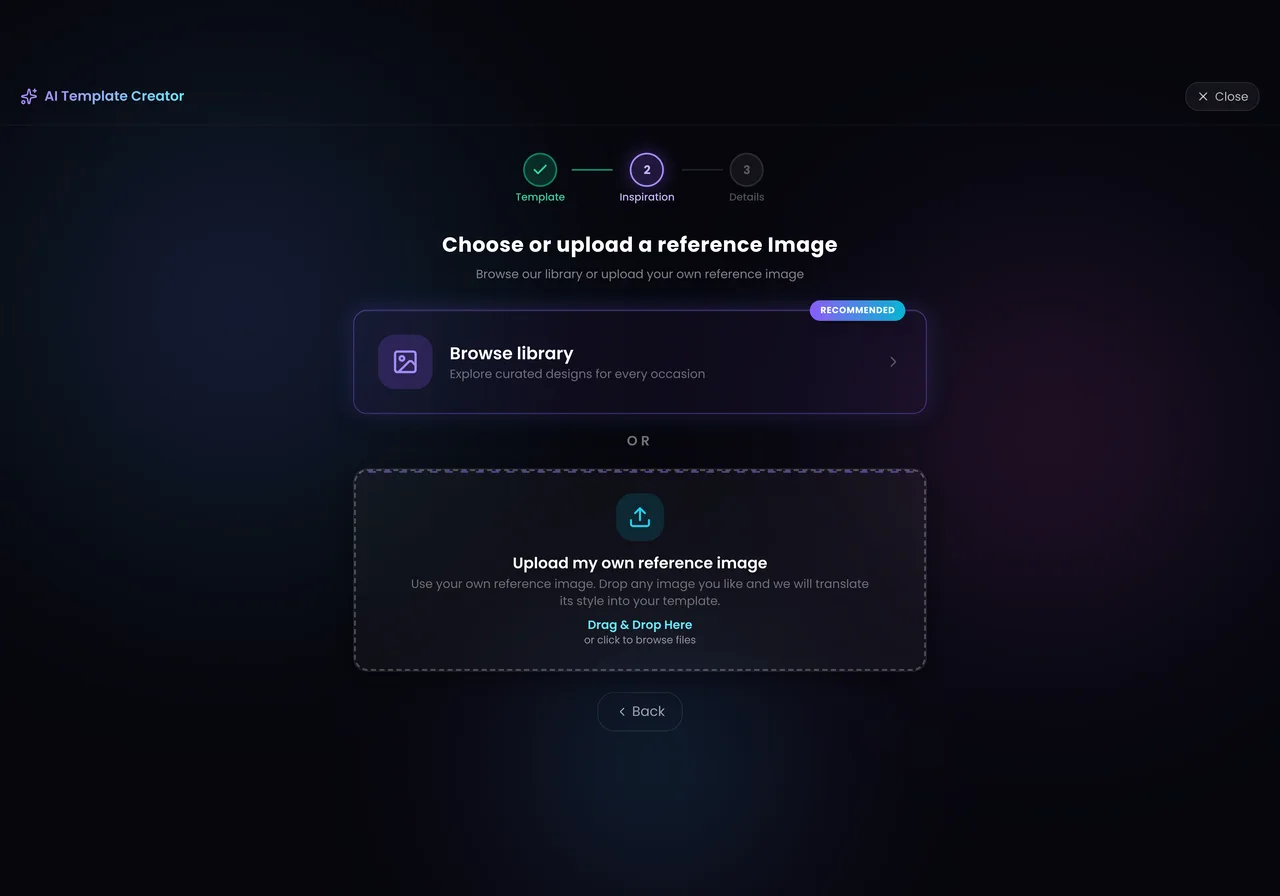
Browse library
A curated set of designs filtered by occasion and style. Fastest route, and the results are predictable because every design in there has already been tested.
Upload my own reference
Drop in any image and its style gets translated into your template. This is the one to use when the event already has an invitation, because the template will match it.
The library is marked as recommended for a reason: if you have no strong direction yet, browsing it is faster than describing what you want. The upload route wins the moment you have artwork to match.
The three steps
The progress bar at the top — Template, Inspiration, Details — is the whole tool. There is nothing hidden behind it.
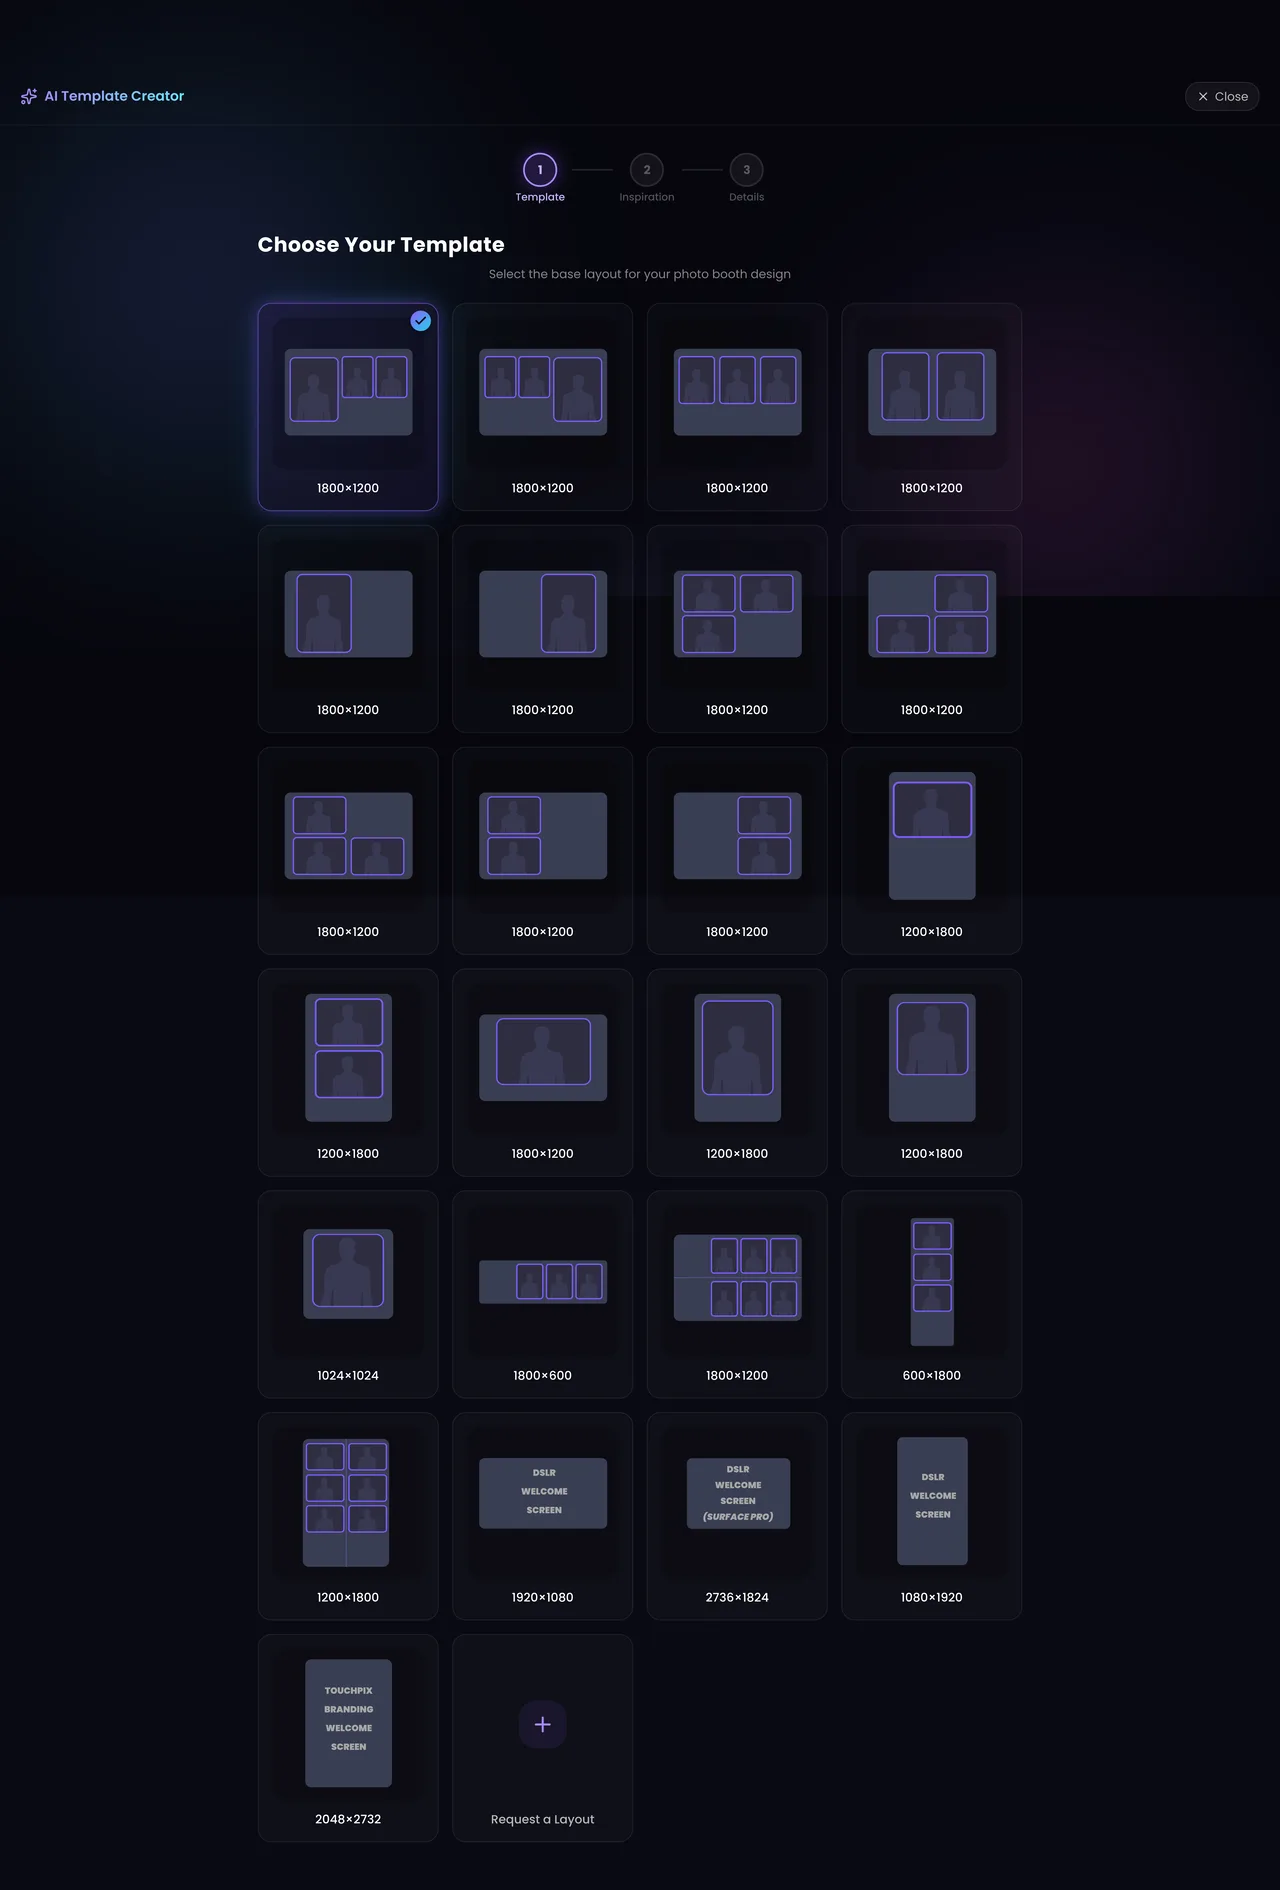
Choose your layout
The first screen is a grid of layouts, each labelled with its pixel size. Pick by what your booth prints, not by which arrangement looks nicest: the dimensions are the part you cannot change later.
Alongside the standard print sizes there are strip, square and vertical formats, plus screen sizes for welcome screens. If nothing fits, Request a Layout lets you describe what you need — new layouts are usually added within 24 to 48 hours.
Give it a style
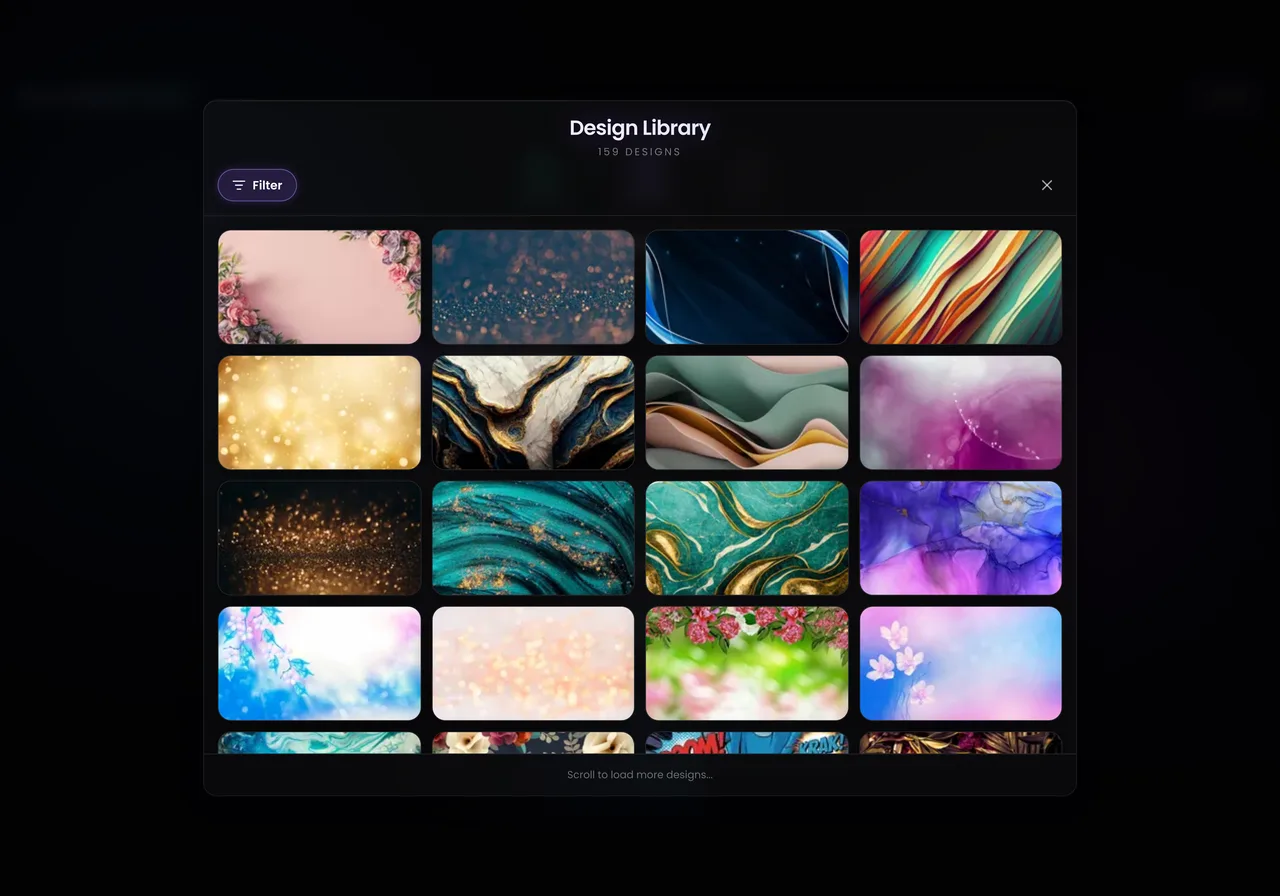
Either open Browse library and filter, or drop your own image into the dropzone below. Both feed the same thing: the visual direction for your template.
The library filters by Occasion — quinceañera, wedding, baby shower, graduation, corporate, and more — and by Style: floral, minimalist, glitter, vintage, luxury, neon, boho. Combining one of each is usually enough to get to a handful of candidates.
If you upload instead, the tool reads the colours, typography and mood of your image and translates them. An invitation works even when it has text on it.
Personalize the details
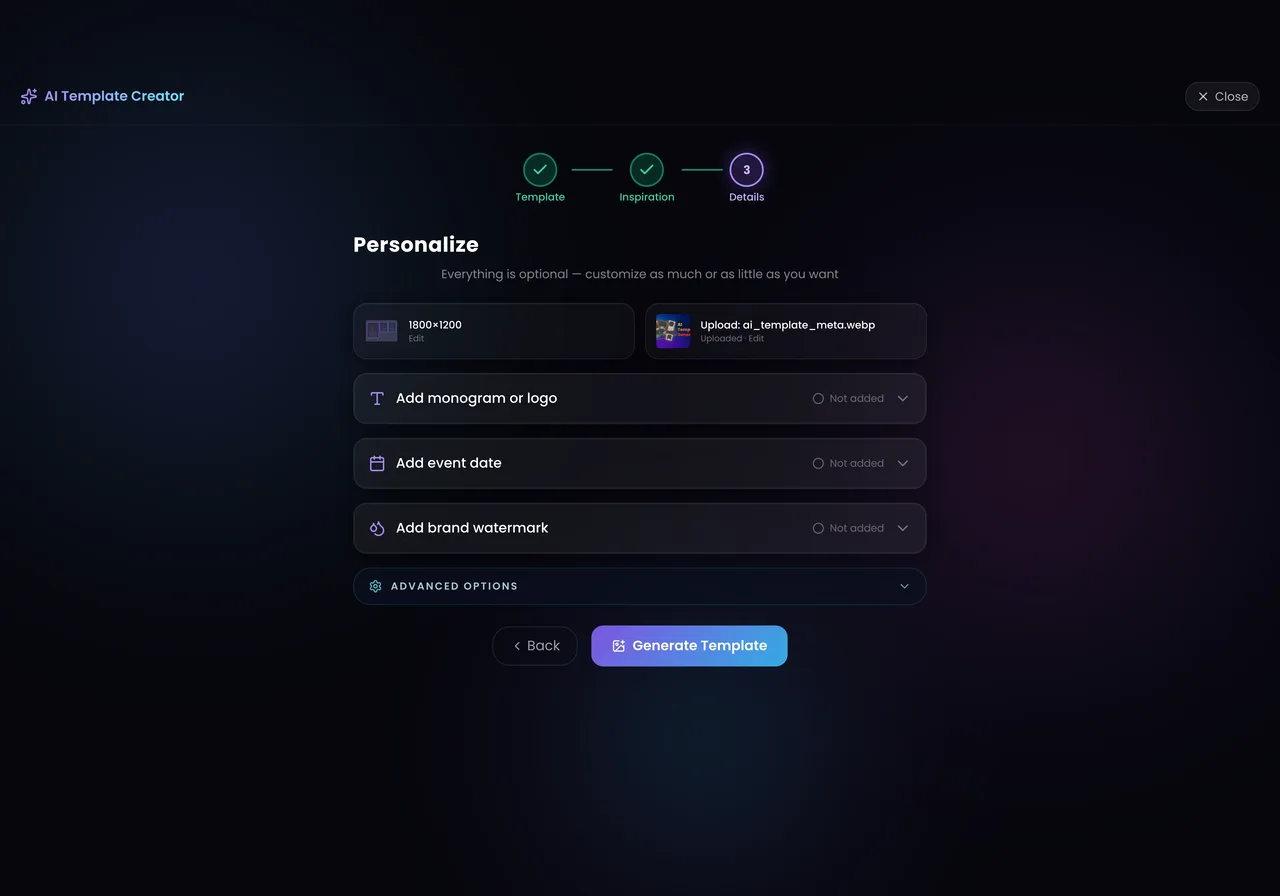
Three collapsed sections: Add monogram or logo, Add event date and Add brand watermark. The heading calls them optional, but the advice here is to open all three — and the monogram one above all.
Put the monogram details in the monogram fields: a name or initials, and the occasion. There is a habit worth breaking here — uploading a reference image and then typing something like "monogram below the frame" into special instructions while the monogram fields sit empty. Those fields are what the generation actually reads.
Filling everything in does not crowd the design. The flow balances the monogram, the date and the watermark against the artwork so they sit together rather than piling up on it. And if you end up not liking where the monogram landed, the generation hands you the template without it anyway — see the next step.
Generate and collect three files
Press Generate Template. It takes up to about a minute and a half, and you do not have to sit through it — you can close the window and pick the result up in your dashboard later.
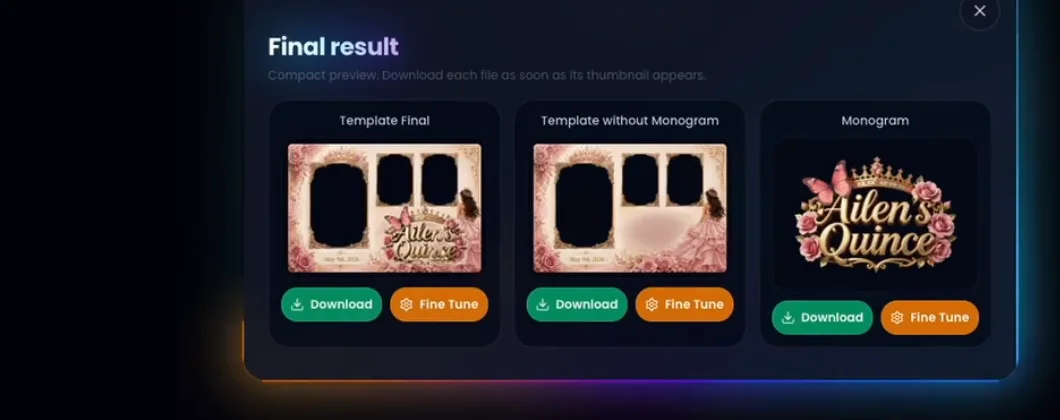
What comes back is not one file but three: Template Final, Template without Monogram and the Monogram on its own. Each has its own Download button.
That second file is the quietly useful one. A template without the monogram is a reusable shell — same design, different event, no regeneration needed.
Advanced options worth knowing
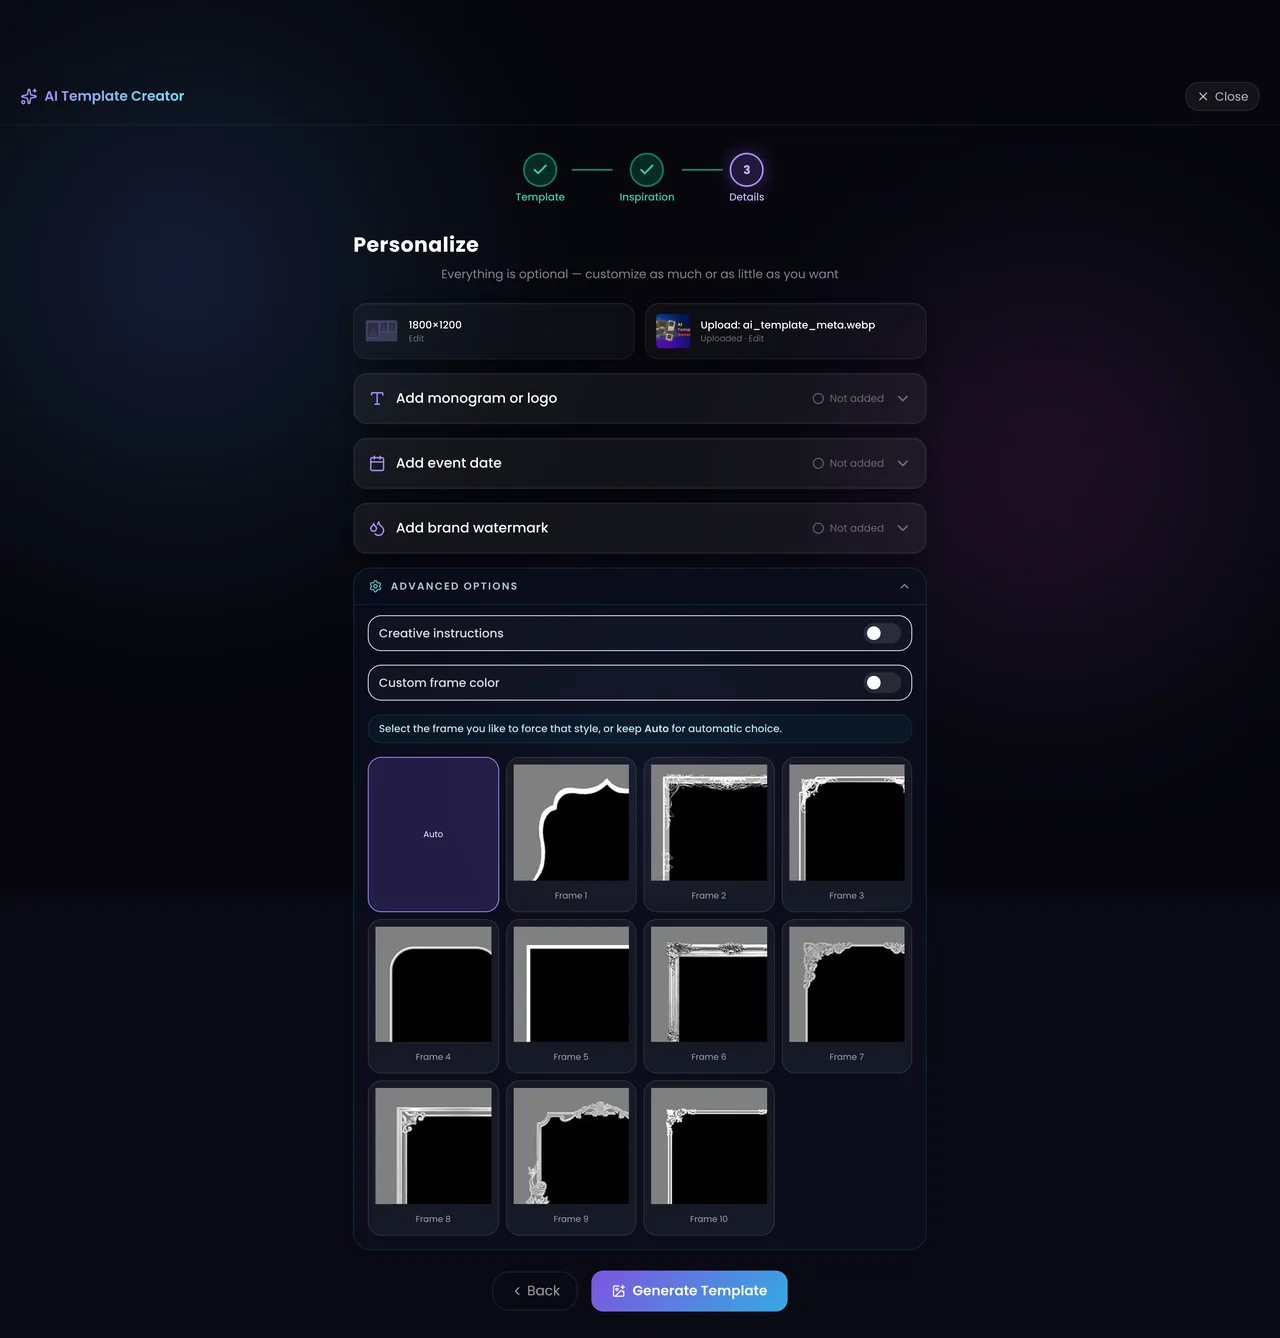
Collapsed at the bottom of the Personalize step. You can ignore it entirely, but three settings in there solve problems that are otherwise hard to fix.
Force a frame shape
By default the frame shape is set to Auto and the tool picks one to suit the style. The grid below lets you override that and force a specific shape — arched, rounded, ornate, square.
Worth using when you already know the shape, for instance because it has to match signage that is already printed.
Pin the frame colour
Custom frame colour accepts either a colour picker value or a text description. The text option is the more useful of the two: "Metallic Gold" or "Brushed Silver" carry a finish, which a flat hex value cannot.
This is the setting to reach for when a client has an exact colour and the automatic choice keeps drifting off it.
Add template design instructions
Template design instructions is a free text box for visual elements, colors, and mood. For example, "Keep the girl from the reference image and place her at the bottom left" or "Maintain an enchanted forest feel with a green and silver color palette". Note: Text in your reference image is ignored. For instructions about logos, text, or monograms, use Add monogram or logo.
Same rule as everywhere else in these tools: describe what you want to see. Instructions written as what you do not want tend to produce exactly the thing you were trying to avoid.
Getting better results
Use 1:1 or 4:3 reference images
Reference images in those ratios consistently give better results than very wide or very tall ones. The tool tells you this in its own loading screen, and it is worth taking seriously.
An invitation is the best possible reference
It already carries the palette, the typography and the mood of the event, decided by someone who was thinking about exactly that. Text on it is not a problem.
Do not wait on the generation
You can close the window and come back. The result lands in your dashboard either way, so a slow generation does not have to block anything else you are doing.
Keep the version without the monogram
It is the reusable one. Download all three files even when you only need the finished template today.
Get the size right the first time
Everything else on the page can be adjusted or regenerated. The output dimensions are the one decision that follows the file forever, so check what your booth software expects before you start.
Common mistakes
Picking the layout by looks
The thumbnails all look fine at thumbnail size. The number under them is the part that matters — a beautiful template at the wrong dimensions is unusable.
Uploading a screenshot of an invitation
A photo or screenshot of the artwork gives a muddy read on the colours. Use the original file whenever you have it.
Describing the monogram in special instructions instead of the monogram fields
Uploading a reference and typing "monogram below the frame" into special instructions, with the monogram fields left blank, is the most common way to end up without the monogram you wanted. Put the name and the occasion in the fields built for them.
Regenerating instead of fine-tuning
Each result has a Fine Tune button. Running the whole generation again spends another two credits and gives you something new rather than something closer.
About the monogram
The template comes back with a monogram already on it, and for most events that is the end of the story. But the monogram generator is a separate tool with far more control — colours, decorative elements, style, aspect ratio — and it produces a transparent PNG you can drop onto the template yourself.
If the monogram is the centrepiece of the event rather than a detail in the corner, it is worth making it there instead.
Read: how to make a monogram with AIFrequently asked questions
Do I need Photoshop or any design software?
No. The whole process runs in your browser and consists of picking a layout, choosing or uploading a reference image, and filling in optional fields. Templates come out production-ready with transparent photo slots, so there is no post-production step.
What size should my photo booth template be?
It depends on what your booth software expects. 1800×1200 is the standard 6×4 print; there are also strip, square and vertical layouts, plus screen sizes such as 1920×1080. Pick the size first, because it is the one thing you cannot change afterwards.
Can I use my own invitation as the design?
Yes. Upload it as your reference image and the tool translates its colours, typography and mood into the template. It works even if the invitation has text on it.
How long does a template take to generate?
Up to about a minute and a half. You do not have to wait on the screen — you can close the window and find the finished template in your dashboard.
What files do I get?
Three: the final template, the same template without the monogram, and the monogram on its own. The version without the monogram is reusable across different events.
Can I add my studio branding?
Yes, through the brand watermark section on the Personalize step. It is what turns a generic design into something recognisably yours.
Make your first template
Pick the size your booth prints, browse the library for two minutes, and generate one. The whole loop is short enough that the first attempt teaches you more than any amount of planning.